


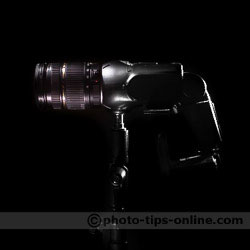
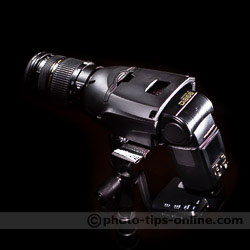
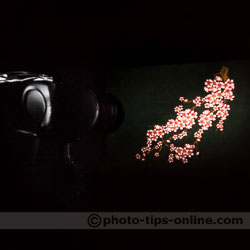
Light Blaster is a new and unique speedlight accessory that allows you to project images on surfaces for creating backgrounds for your photos and producing different kinds of special effects. To use Light Blaster, you need to have a spare lens and a spare speedlight, both of which you attach to the unit, essentially assembling a strobe-base projector. By inserting different slides and positioning Light Blaster in various ways, you can produce a multitude of creative setups.
 |
 |
 |
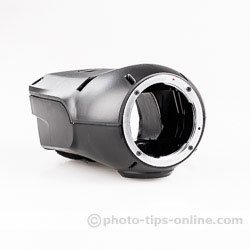
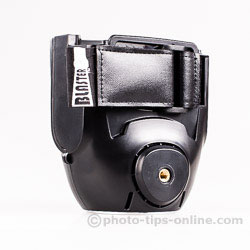
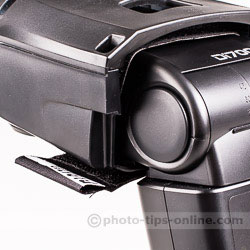
Light Blaster is well-built: the lens and light stand attachments are metal, and the body itself is made of a rigid plastic. The speedlight attachment is strap-based. We recommend ensuring that your flash is securely attached every time you use Light Blaster, because if you fail to do so, you are running a risk of the flash falling out and getting damaged. We tried attaching a number of different speedlights and felt that the strap can securely hold any of them.
 |
 |
 |
 |
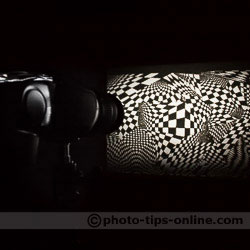
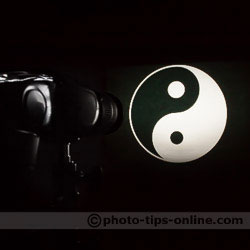
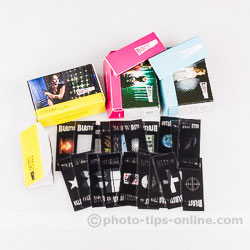
Light Blaster comes with a single sample slide, so you can try it out right out of the box. You can also purchase Creative Kits from Light Blaster, such as Backdrop Kit, Effects Kit, Wings Kit, etc. containing over 20 pre-made transparencies each. We especially liked the first two kits. Here is just a few of our favorite images:
 |
 |
 |
 |
You can also print your own slides (if you have a proper printer) to turn your photos into beautiful backdrops. Light Blaster offers a downloadable template that can be used to simplify the production of your own slides.
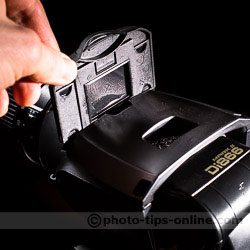
Whether you use pre-made or your own transparencies, they need to be installed into a cartridge that goes into the slot in the Light Blaster's body. We were pleased to see that each Creative Kit also includes a cartridge, which means that if you buy the kits, you'll have spare cartridges. You can pre-load them with different transparencies and swap the projected images when necessary.
 |
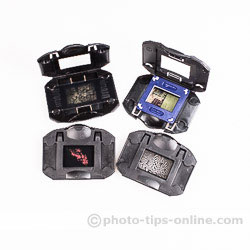 |
It is worth mentioning that some of the transparencies from Creative Kits fit the cartridges better than others. So, there is little variance in sizes, which can be easily fixed by trimming the transparencies a little bit with a pair of scissors.
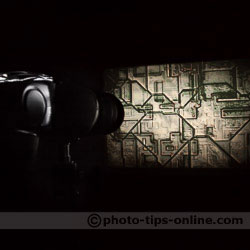
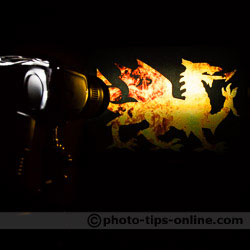
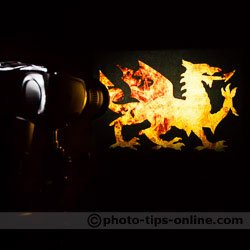
Depending on the image you project, you may or may not need to pay attention to the flash zoom setting. For best results, we recommend setting the flash zoom to the maximum position (typically 105mm or 200mm). In our tests, wider flash zoom settings (for example, 24mm) caused a noticeable light fall-off, while at 105mm, the light was much more evenly distributed across the projected image. In the example below, you can see that at 24mm, the dragon legs are practically missing (left photo), but setting the flash to 105mm fixed the problem.
 |
 |
Since Light Blaster uses a lens to project an image, the lens needs to be focused manually. You can take a few test shots while adjusting the flash zoom to figure out the proper focus ring position (this is one of the approaches recommended by the manufacturer). We, however, found an even better way to focus Light Blaster: the stroboscopic/multi-flash mode (assuming your flash has one). Our preferred way is to set the frequency to 2 Hz, number of flashes to 10, and the light output from 1/128 to 1/16. With these settings, all you need to do is to press the pilot button on the flash once, after which you will have 5 seconds of the flash firing continuously 2 times per second. This is typically enough for you to get the focus right by rotating the focus ring while watching the projected image. The only drawback of this approach is that in cases when the ambient light is too bright, the low power setting of the flash may not be enough to see the projected image clearly.
Please note that speedlights can release a significant amount of energy when at the maximum power. The slides inside Light Blaster are positioned fairly close to the flash lens. So, there is a potential risk of melting the transparencies, especially when firing in rapid successions. This issue is not really specific to Light Blaster. It is not unusual for photographers to melt their color gels or even overheat the speedlights themselves. So, this is just something you need to watch out for in general. In our tests and a couple of photo sessions, however, we have never came even close to melting the slides, although we kept the photoshoots at the regular pace.
After using Light Blaster for a while, we felt that it had a lot of potential. The most straightforward use is to project backgrounds on a wall, like in the top image below. You can also project images on your subjects (see, for example, the bottom image below). If can even get more than one Light Blaster and do both. There are so many ways you can use different surfaces, lights, gels, etc.
 |
 |
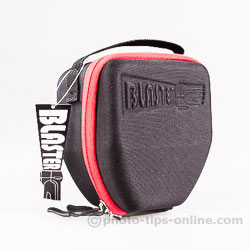
Light Blaster comes with a custom designed semi-hard case, which we really appreciate. Not only does it protect the unit, but it also has a small pocket inside, where you can put some of your slides or a couple of Creative Kits.
 |
 |
In conclusion, Light Blaster is an exciting flash accessory, which opens up a whole new world for creativity. We can highly recommend it to anyone who uses multiple speedlights. It can really transform your studio or a location shoot. A few tips to remember is to always secure your flash, use stroboscopic mode for quick focusing, and set flash zoom to 105mm for the even light spread.